Materials
- Milk cotton yarn 4 ply
- 2.5 mm & 2.0 mm crochet hook for small snowman
- 4.0 mm & 3.5 mm crochet hook for big snowman
- 8 mm safety eyes for small snowman
- 12 mm safety eyes for big snowman
- Black embroidery thread
- Stitch marker
- Scissor
- Needle
- Fiberfill stuffing
- Button x 2
- Colour beads & Christmas decorative (optional)
- Hot glue gun (optional)
Abbreviations (U.S Term)
-
mr = magic ring
- rnd = round
- r = row
- sc = single crochet
- inc = increase (2 sc in each st)
- dec = decrease (2 sc together)
- hdc = half double crochet
- blo = back loop only
- flo = front loop only
- sl st = slip stitch
- ch = chain
- rep = repeat
Skill Level
-
Intermediate
Finished Size
-
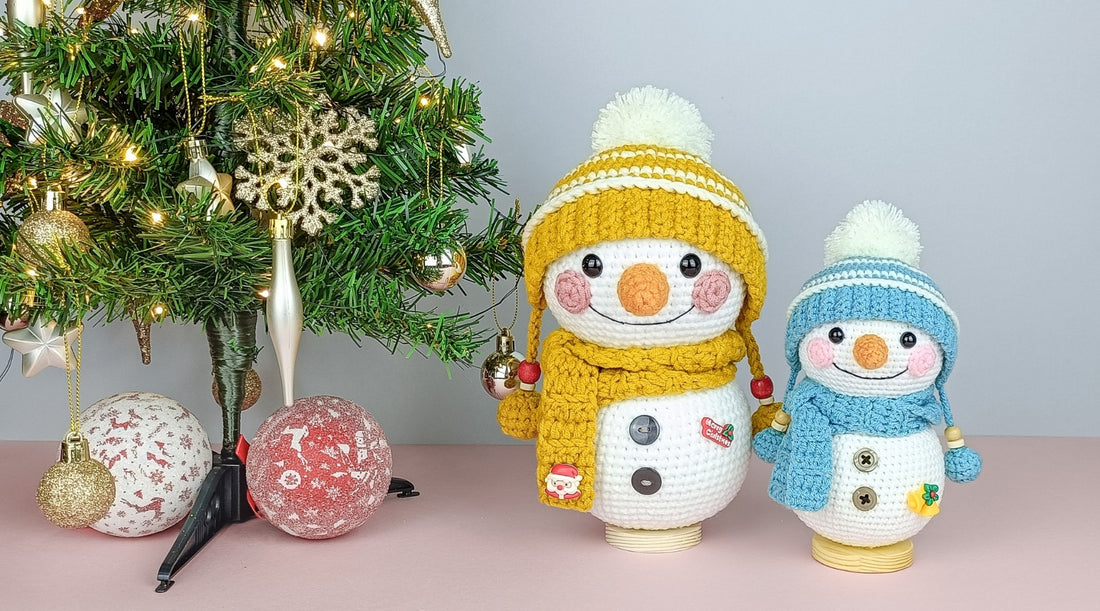
Approximately 8.6" / 22.5 cm tall for big snowman and 6.3" / 16.5 cm tall for small snowman when made with the indicated yarn.
Notes
Copyright & Rights of Use
Copyright ©2024
Owl On Hook®
All Rights Reserved.
Calysta Hannah of Owl On Hook is the designer of Anthony The Snowman crochet pattern.
This pattern is designed and copyrighted by Calysta Hannah and is an intellectual property of Owl On Hook®. This pattern is for personal use only. It is against the law to resell, distribute and/or translate this pattern and/or any part of this pattern into a different language under a different designer's name (in print or digital). Strictly no transmission is allowed whether through wire or wireless means to the public without written permission and/of consent of Owl On Hook®.


Let's Get Started!
HEAD
In white yarn.
Rnd 1: Mr, sc 8. [8]
Rnd 2: Inc in all 8 st. [16]
Rnd 3: (Sc in next st, inc) x 8. [24]
Start stuffing the body with fiberfill stuffing as you continue.
Rnd 23: (Sc in next 6 st, dec) x 6. [42]
Rnd 24: Sc in all 42 st. [42]
In orange yarn.
Rnd 1: Mr, sc 4. [4]
Rnd 2: (Sc in next st, inc) x 2. [6]
Rnd 3: (Sc in next 2 st, inc) x 2. [8]
Rnd 4: (Sc in next 3 st, inc) x 2. [10]
Rnd 5-7: Sc in all 10 st. [10]
Sl st in next st and fasten off. Leave a long yarn tail for sewing.
Stuff the nose firmly with fiberfill stuffing.
Sew the nose onto the head between rnd 13-16.
MOUTH
BEANIE
Alternate between 2 rnd of yellow yarn (y) and 1 rnd of off-white yarn (ow).
*End each rnd with a sl st. To create an almost seamless sl st, pull your sl st tight at the end of each rnd.
Rnd 1 (y) : Mr, sc 8. Sl st. [8]
Rnd 4 (y): (Sc in next 3 st, inc) x 6. Sl st. [30]
Rnd 5 (y): (Sc in next 4 st, inc) x 6. Sl st. [36]
Rnd 13 (y): Sc in all 60 st. Sl st. [60]
Rnd 14 (y): Sc in all 60 st. Sl st. [60]
Do not fasten off as we will continue to work on the brim of the hat.
BRIM
Continue in yellow yarn. Change to 2 mm (small snowman) / 3.5 mm (big snowman) hook.
R1: Ch 5, sc in next 4 st. Blo sl st in the 1st st of the rnd on the hat. Blo sl st in next st. Ch 1, turn. [4]
Refer to image 1, 2 & 3.


R2: Blo sc in next 4 st. Ch 1, turn. [4]
R3: Blo sc in next 4 st. Blo sl st in next st on the hat. Blo sl st in next st. Ch 1, turn. [4]
Refer to image 4 & 5.


R4-38: Rep R2-R3.
R39: Blo sc in next 4 st. Blo sl st in next st on the hat. [4]
Change to 4 mm hook. Change to off-white yarn.
R40: Ch 1. Sc in next 22 st. Sc in the Flo of next 38 st. Sl st to the beginning st. [60]


Fasten off and weave in end.
POMPOM x 2
In yellow yarn.
Rnd 1: Mr, sc 6. [6]
Rnd 2: Inc in all 6 st. [12]
Rnd 3-4: Sc in all 12 st. [12]
Stuff the pompom firmly with fiberfill stuffing.
Rnd 5: (Dec) x 6. [6]
CONNECTING THE POMPOM TO THE HAT
Join yarn to the corner of the hat. Ch 9.
Refer to image 8.

Fasten off and leave a long yarn tail for sewing. Sew the ch onto the pom pom.
*You can slot in beads (optional) as decorative.
Rep on the other side of the hat.
In yellow yarn.
*All ch 2 counts as 1 hdc.
Ch 6.
R1: In the 3rd ch from hook, hdc in each st. Ch 1, turn. [5]
R2-61: Blo hdc in each st. Ch 1, turn. [5]
Fasten off and weave in ends.
Tie the scarf around the neck of the snowman.

#owlonhook
Gracias and Thank you.
PATTERN NOTES:
Do share with us your completed project or reach us at anytime should you need help or advise along the way. We love to share and spread the love, joy and encouragement amongst our fellow crocheters. Follow us and link us in your finished projects on Instagram @owlonhook and see new projects and contributions from fellow crocheters!Let's keep stitching the love!
Crochetly yours, Calysta
Teams of Owl On Hook

