这遍钩针图解是英文版。如果您想要阅读中文版,请点击这里: 鸡蛋兔珊妮钩针图解。
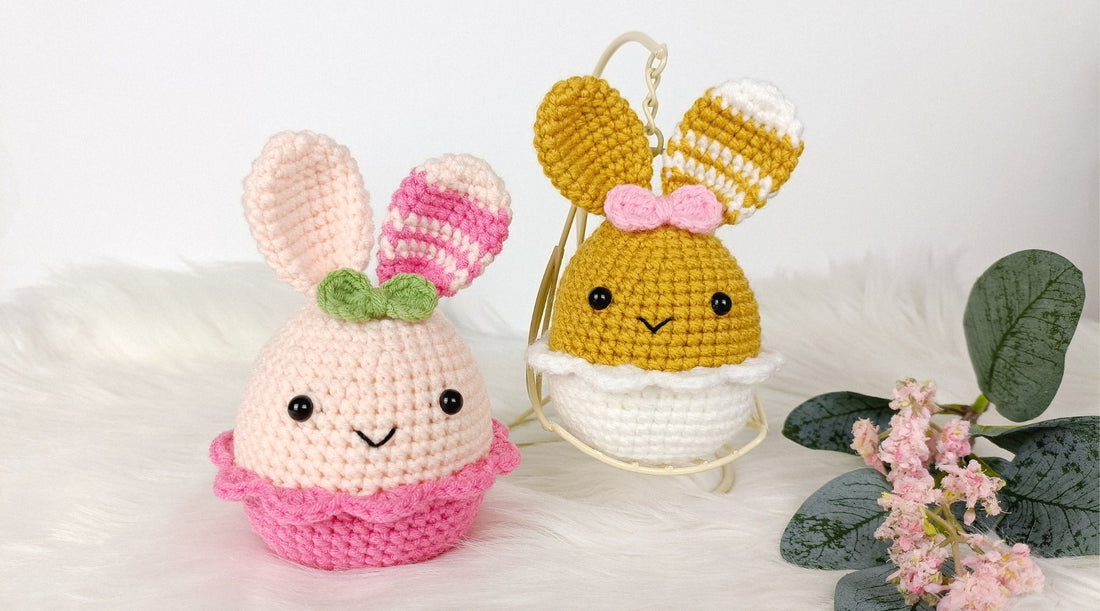
This colorful, happy looking Sunny The Egg Bunny is a beginner friendly crochet pattern. Merging the cuteness of the Easter bunny and happiness of Easter eggs, Sunny The Egg Bunny is cute and fun to make. A perfect gift or ornament for Easter or a simple bag charm for your favorite bag.
Materials
- Milk cotton yarn 4-ply
- 2.5 mm crochet hook
- 7 mm round safety eyes
- Black embroidery thread
- Fibrefill stuffing
- Stitch markers
- Yarn needle
- Scissor
Abbreviations (U.S Term)
- rnd = round
- ch = chain
- sc = single crochet
- hdc = half double crochet
- tr = treble crochet
- inc = increase
- dec = decrease
- sk = skip
- st / sts = stitch / stitches
- sl st = slip stitch
- blo = back loop
- flo = front loop
Finished Size
-
Approximately 5.5" (14 cm) tall
Skill Level
-
Easy - Intermediate
COPYRIGHT & RIGHTS OF USE
Copyright ©2022
Owl On Hook®
All Rights Reserved.
Calysta Hannah of Owl On Hook is the designer of Sunny The Egg Bunny crochet pattern.
This pattern is designed and copyrighted by Calysta Hannah and is an intellectual property of Owl On Hook®. This pattern is for personal use only. It is against the law to resell, distribute and/or translate this pattern and/or any part of this pattern into a different language under a different designer's name (in print or digital). Strictly no transmission is allowed whether through wire or wireless means to the public without written permission and/of consent of Owl On Hook®.
Let's Get Started!
HEAD & BODY
Rnd 2: Inc in all 6 st. [12]
Rnd 3: (Sc in next st, inc in next st ) x 6. [18]
Rnd 4: (Sc in next 2 st, inc in next st) x 6. [24]
Change to dark pink yarn.
Join yarn to front loop at Rnd 17. We will be working on Rnd 17 twice. First on the front loop and second on the back loop.
Attach safety eyes between Rnd 11 and 12, leaving 8 sts (7 holes) between them.
Start stuffing the head and body with fiberfill stuffing as you continue.
Rnd 25: (Sc in each of next 3 st, dec) x 6. [24]
Rnd 28: (Dec) x 6. [6]
Stuff the head firmly with fibrefill stuffing.
Sl st in next st and fasten off. Leave a long yarn tail.
Thread the yarn tail through a needle and weave the needle through the front loop of each of the 6 st. Pull the yarn tail gently to close the hole. Insert the needle through the middle of the hole and pull through the head.
Using black embroidery thread, embroider mouth onto Rnd 13, 2 st apart.
In light pink yarn.
Rnd 1: Start 6 sc in a magic ring. [6]
Rnd 2: Inc in all 6 st. [12]
Rnd 3: (Sc in next st, inc in next st ) x 6. [18]
Rnd 4-10: Sc in all 18 st. [18]
Rnd 11: (Sc in next st, dec) x 6. [12]
Rnd 12: Flatten the ear and sc across both sides of the ear in each of the next 6 st to close the opening.
Fasten off and leave a long yarn tail for sewing.
Sew the 1st ear to the top of the head between Rnd 3-4.
2nd EAR
(dp) = dark pink yarn (Color A)
Rnd 2 (lp): Inc in all 6 st. [12]
Rnd 3 (lp): (Sc in next st, inc in next st ) x 6. [18]
Rnd 4-6 (dp): Sc in all 18 st. [18]
Rnd 7 (lp): Sc in all 18 st. [18]
Rnd 8 (dp): Sc in all 18 st. [18]
Rnd 9 (lp): Sc in all 18 st. [18]
Rnd 10 (dp): Sc in all 18 st. [18]
Rnd 11 (dp): (Sc in next st, dec) x 6. [12]
Rnd 12 (dp): Flatten the ear and sc across both sides of the ear in each of the next 6 st to close the opening.
RIBBON
ch 4. 3 tr into the 1st st. ch 3, sl st into 1st st. ch 3, 3 tr into 1st st. ch 3, sl st into 1st st.
Sew ribbon to the head.
Hooray! You have completed Sunny The Egg Bunny!
#owlonhook
Gracias and Thank you.
PATTERN NOTES:
Do share with us your completed project or reach us at anytime should you need help or advise along the way. We love to share and spread the love, joy and encouragement amongst our fellow crocheters. Follow us and link us in your finished projects on Instagram @owlonhook and see new projects and contributions from fellow crocheters!
Let's keep stitching the love!
Crochetly yours,
Calysta
Teams of Owl On Hook

